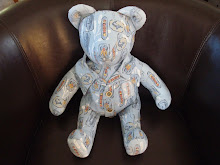
First step this morning was sewing the head on. This took a little ripping out and redoing the chin in order to fit. I could hear my old neighbor from 35 years ago (a seamstress) reminding me that small errors in seam size make bigger errors as you repeat them. Lesson re-learned. After the head it was time for the legs. Once again I got my right and left confused and nearly had backwards legs, but I finally figured it out and carefully marked one leg and the corresponding opening for the leg with an X. I supposed I could have left the other leg blank but I marked it with an O instead. I'm strange that way. So here are pictures of Phillip with his head and legs on. He is ready to stuff!

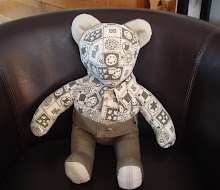
I was able to sit in the comfortable couch and stuff the bear while I watched the Charger game. I followed the instructions and stuffed the head first, then the feet, legs and arms. At that point we are to sit the bear on our lap and finish stuffing the body. We do this so the bear will sit well. It was nice watching Phillip become fully himself while watching football. I have a hunch the real Phillip was a Charger fan, too. Here he is, ready to be stuffed by using the opening in the back and then finished according to the pattern instructions.


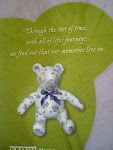
So, my first bear, Phillip, is finished and ready to get the ribbon around his neck. The ribbon will have a small tag on it, saying the bear is made by a Sharp Hospice volunteer and it will be signed by me. It seems odd to have made this bear, thinking all the time of a young man I never knew, whose family loved him and misses him. Many times I've wanted to call the number I have on the intake form and let the requester know I was working on the Phillip bear. I wanted to ask questions about him and somehow give comfort to the family. Of course, I didn't do any of that. I'm quite sure that is not allowed as it would be such an invasion of privacy.
I'm taking Phillip in to work with me tomorrow to share with Carolyn and Colette. Then I'll take it to the volunteer center and say goodbye to him. I suspect this will be emotional for me. I also know it will be something that heals me in little ways. One thing I know for sure, this is the first Memory Bear made by me, but it is far from the last.


Beautiful Bear, Laurie. I am glad you mentioned the strict guidelines about adding anything. I do like that you put the pocket on the back...a very good idea, imo, and the buttons added just the right finishing touch.
ReplyDeleteAnd I liked reading this line: "Lesson re-learned."
Thanks, Siz. My friends put pockets on the back so I knew that would be okay. I really wanted to use that tag, too. I know the family who received this bear will be grateful to have him. That feels good.
ReplyDeleteI understand the pull to call them, but know you decided right. Keeping the focus on Phillip and your role quiet is what makes it such a wonderful, selfless task. I did not know of this program until you mentioned it. I want to follow along, because I know you will be making many more bears.
ReplyDeleteGood job on the bear! What a great story! I am cheering you on!
ReplyDeleteHe looks beautiful. I love the pocket on the back.
ReplyDeleteMargo
He's beautiful, you're beautiful... Makes me smile.. I love pocket on the back of him as well! I love that your heart wanted to connect with Phillip's family even though you couldn't do that. I'm sure they will sense the love put into this bear! :)
ReplyDeleteI like the pattern on the shirt placement on the bear. You did great! I look for to seeing all the bears you are going to make! Thank you so much for sharing this.
ReplyDeleteThanks everyone. Your comments and support give me the courage to make more!
ReplyDelete